Add via Wi-Fi (AP scan)
Use this option to add devices through their access point (AP).
Prerequisites
- Shelly Smart Control app installed on your mobile device
- Active account in Shelly Cloud. For more information on how to create an account, visit Account Registration.
- Active AP of the target device
Add Device via Wi-Fi (AP Scan)
- Open the Shelly Smart Control app.
- If this is your first device, tap the Add Device button. If you’ve already added devices, tap the plus sign (+) in the bottom-right corner of the screen. (Fig. 1)
- Select Add via Wi-Fi (AP scan). (Fig. 2)
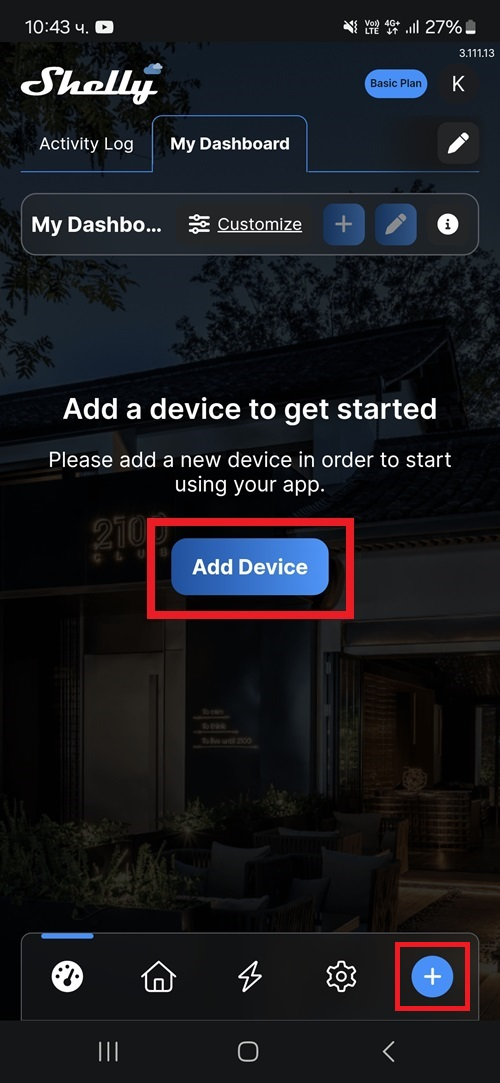
Fig. 1
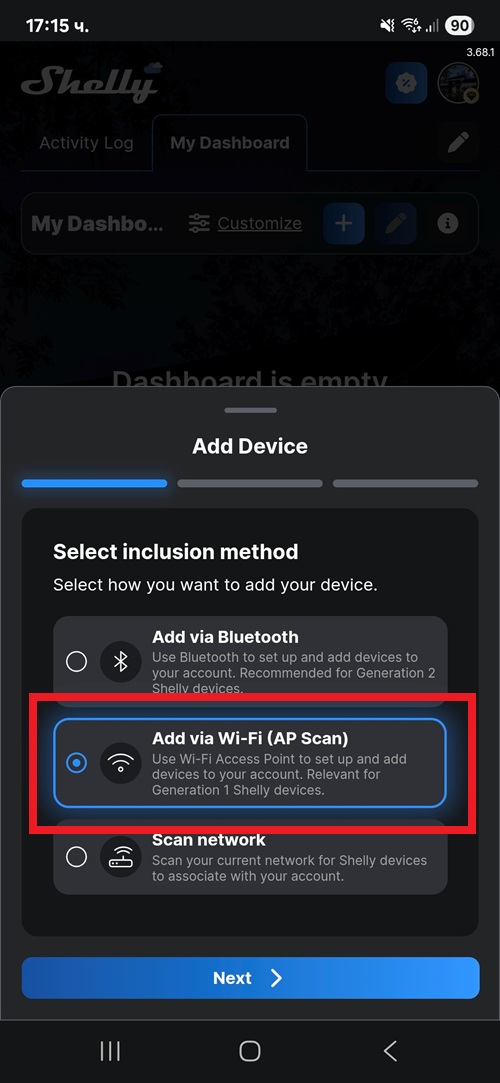
Fig. 2
- Tap Next. A list of available devices will appear.
- Select the device you want to add and tap Next.
- A message will appear confirming the device will be added to your current Wi-Fi network. Tap Edit if you’d like to assign it to a different network.
- Tap Add device. (Fig. 3)
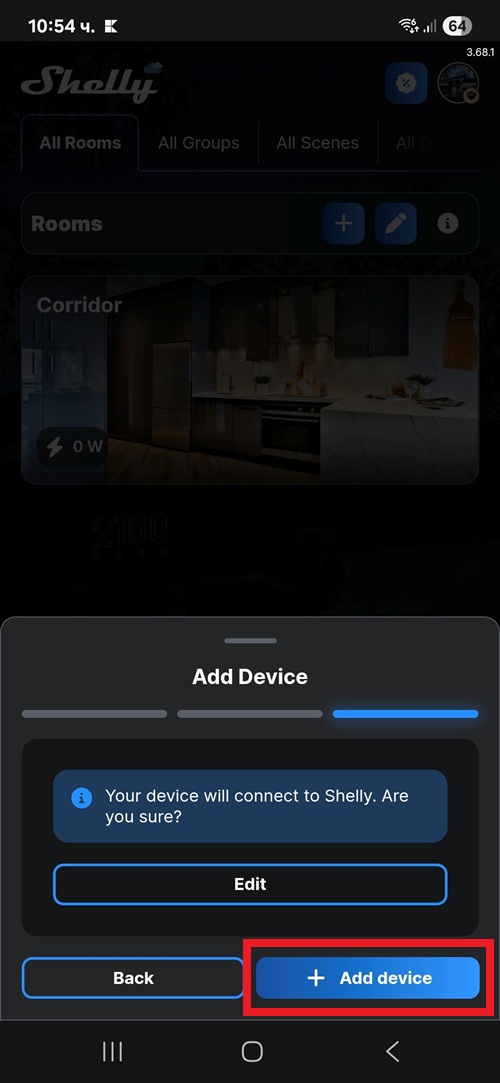
Fig. 3
- Enter a name for the device and choose its icon. Tap Next.
- Choose one of the following options:
- Select an existing room from the list, or search for a room using the Search bar.
- Create a new room by tapping + Add room. (Fig. 4)
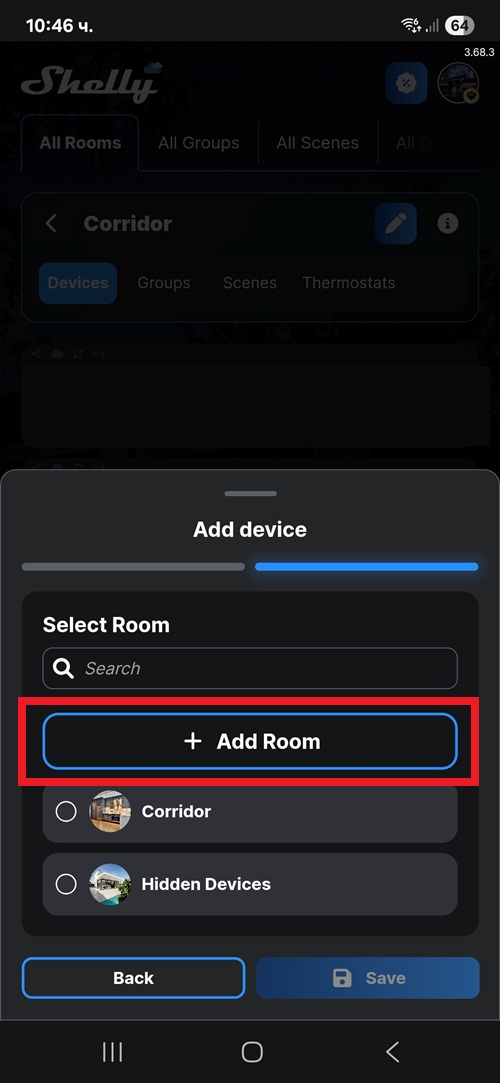
Fig. 4
- Tap Save. The device is now added to your app.